
How to update our ecommerce prices using AWS SES
9 minutes readingIntroduction
The presented solution is inspired by a specific need of a customer of ours: to allow purchasing managers to update the online store’s price lists quickly without forcing them to use a new tool.
Since purchasing managers are used to filling in price lists in spreadsheets and exchanging them as email attachments, we decided to keep this process.
The solution we developed receives the emails with the attached spreadsheet, verifies that there are no errors, and updates the online store prices using the related APIs. Finally, it sends an email back to the sender reporting any critical issues or indicating that the file has been properly processed.
To realize the described solution, we relied on several AWS services:
- Amazon Route 53
- Amazon Simple email Service
- AWS Lambda
- Amazon EventBridge
- Amazon CloudWatch
- Amazon S3
We used the AWS Serverless Application Model (SAM) framework to orchestrate the services.
The developed solution allows future scheduling of price changes, so it manages an update queue by leveraging additional AWS services.
To simplify the article, we provide a detailed description of how to develop it without the scheduling feature and the details about the online store integration.
Configuration
SES Verified identity
The first step to enable SES email receiving consists of verifying the domain ownership we want to use. The fastest way of doing this is to create a newly verified identity from the SES web console by navigating to Configuration > Verified identities:
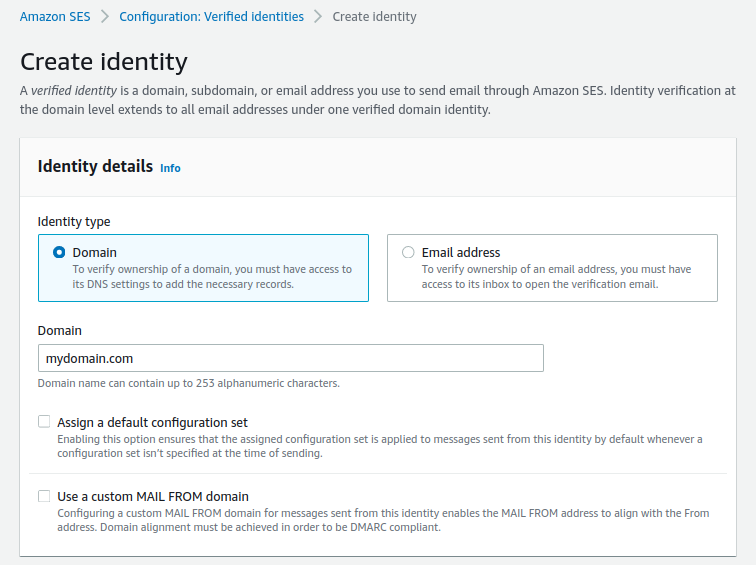
At the end of the creation step, we will be asked to publish CNAME records in the DNS of our domain, e.g., with the name xxxxxxxxxx._domainkey.mydomain.com and value xxxxxxx.dkim.amazonses.com.
This type of validation, called DomainKeys Identified Mail (DKIM), is required both for the verification of the domain by SES and as an authentication method to verify the origin of an email by applying a digital signature and thus preventing it from spoofing.
Once the necessary DNS records have been published, the verified identity will switch to the “Verified” status.
MX DNS record
Whenever an email is sent, an MX-type DNS call is performed to ask which server is in charge of receiving it.
It is necessary to publish an additional record to the DNS configuration to delegate the receiving of the emails of the chosen domain, e.g., with the name mydomain.com and value 10 inbound-smtp.{region}.amazonaws.com (replace it with the selected AWS Region).
This value indicates that if we want to deliver an email to the recipient example@mydomain.com, the email client will be able to do it by connecting to inbound-smtp.{region}.amazonaws.com.
The value 10 indicates the priority. If more values are set, they are taken in ascending order passing from one server to the next if problems occur during the email delivery. In our example, and according to the AWS documentation, it’s enough to enter just a single value; AWS will ensure the reliability of the receiving endpoint.
SES Sandbox
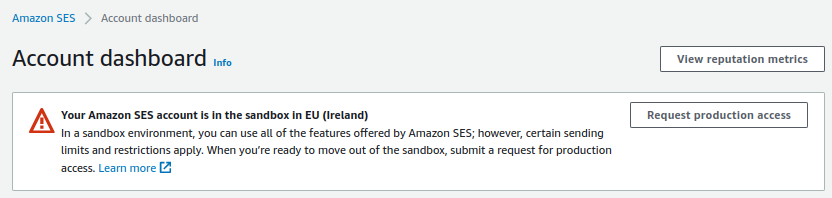
Email sending is enabled only for verified identities when a new AWS account is created.
For example, by verifying mydomain.com it will be possible to send emails only to @mydomain.com addresses. As soon as we enter the SES console, we can understand if the account is still in the sandbox by the presence of the following banner at the top:
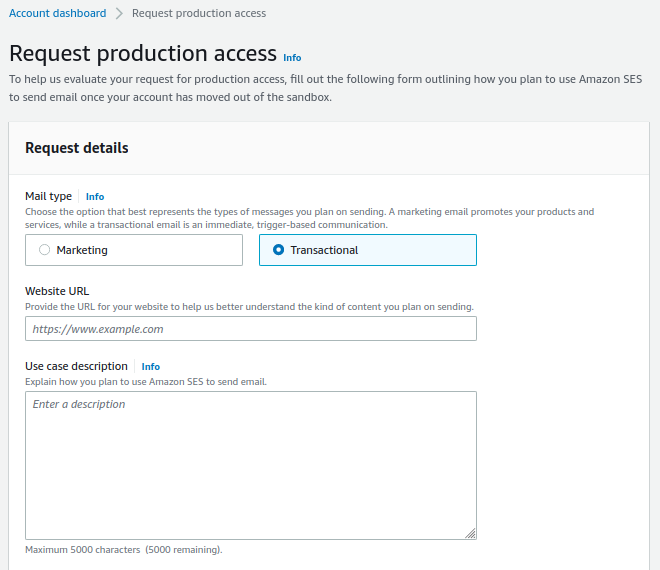
To send emails to any address, we need to open a ticket to the AWS support through a wizard, describing the use case in detail:
It is possible to put up with this limitation during testing by creating an identity verified through the email method:
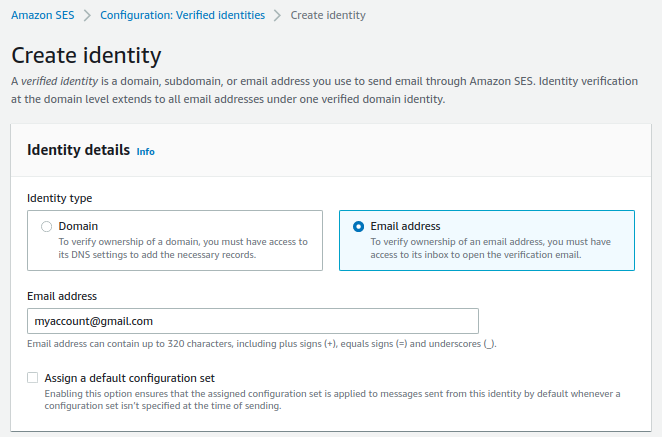
Once the verified identity has been created, clicking on the link received via email from SES (no-reply-aws@amazon.com) will be necessary. This validation method is recommended only for testing, as it is not a verification method robust enough to send and receive emails.
Implementation
Receiving and processing the email
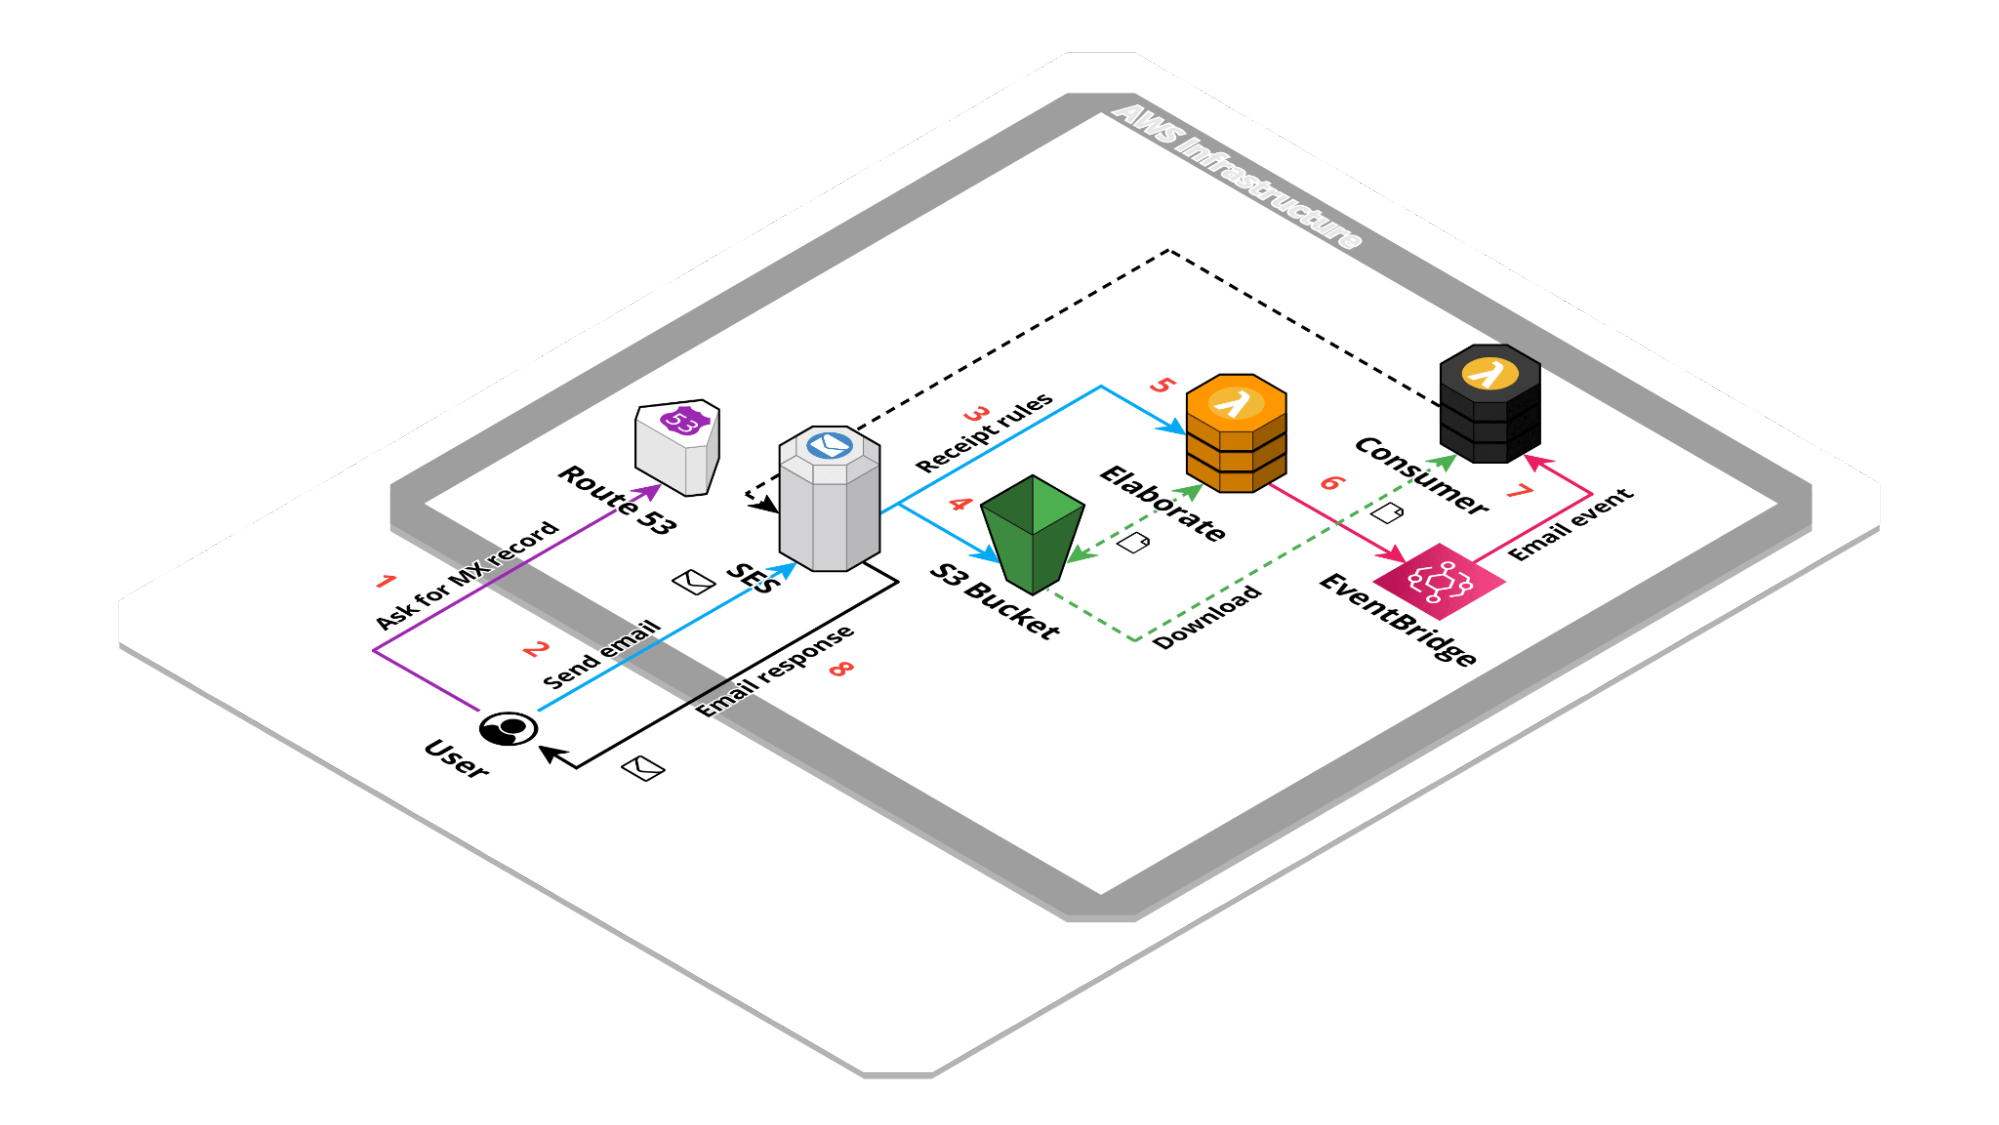
By sending the email, the email client queries the DNS to find out which server to deposit the email on through an MX request [1]. In our example, the domain is managed with Amazon Route 53, which replies with the previously configured MX record, pointing to inbound-smtp.{region}.amazonaws.com as the receiving email server.
The email is then sent to SES [2], which performs predefined actions [3] defined through a Receipt Rule based on the recipient’s address.
SES puts the email content on an S3 bucket [4], and then a Lambda function is executed [5]. The Lambda function downloads the email content from the S3 bucket and processes the content, extracting any attachments. The attachments are then separately uploaded into the same S3 bucket to make it easier to perform integrations.
At the end of the email processing, the Lambda function sends an event to an EventBridge bus [6] with all the information related to sender, recipient, subject, and content (text or HTML), including any attachments.
Receiving and processing the event
EventBridge supports a large number of integrations with other AWS services. In our example, we take a Lambda function that is invoked upon receipt of an email [7]. This can be done using SAM by declaring a Lambda event of type EventBridgeRule using New Email Received as a filter for the detail-type field of the emitted event.
 EmailReceiveFunction:
   Type: AWS::Serverless::Function
   Properties:
     FunctionName: !Ref AWS::StackName
     Handler: index.handler
     Events:
       EmailReceive:
         Type: EventBridgeRule
         Properties:
           EventBusName: !Ref EventBusName
           Pattern:
             detail-type:
               - "New Email Received"
The declared Lambda function will perform the appropriate checks on the subject, content, sender, and recipient. The Lambda function will download the attachment from the S3 bucket and process the content if there are attachments.
/**
* Lambda handler
* @param {object} event
*/
exports.handler = async (event) => {
 const { subject, from, to, attachments } = event.detail
 // [..]
}
It’s possible to send an e-mail with the processing result and the details of possible errors using the SES API:
const SES = require('aws-sdk/clients/ses')
const ses = new SES()

const { subject, from, to, attachments } = event.detail

// elaborate incoming data

await ses.sendEmail({
  Source: to.filter(email => email.endsWith('@mydomain.it')).shift(),
  Destination: {
    ToAddresses: from
  },
  Message: {
    Subject: {
      Data: 'Re: ' + subject
    },
    Body: {
      Text: {
        Data: 'Here the email body response'
      }
    }
  }
}).promise()
Deploy
We developed our solution using SAM so it can be quickly reused in other projects with similar needs.
Quick installation
To deploy via the installation link:
- Log into the AWS WEB Console
- Click on the Deploy Link from the bitbull-serverless/ses-email-receiver GitHub repository. We should use the link for the region where we want the stack to be created.
- Fill in the form shown by inserting the stack name and parameters.

Deploy SAM template
To deploy the solution through SAM
- Install the SAM CLI
- Clone the bitbull-serverless/ses-email-receiver GitHub repository
- Build the code using the
sam buildcommand from the project root. We recommend adding the--use-containerparameter to use a Docker container as the execution environment. - Launch the stack deployment with
sam deploycommand, indicating the profile and the necessary parameters. Adding the--guidedparameter will let the parameters be requested interactively; the configurations will be saved in thesamconfig.tomlfile.
At the end of the deployment phase, the template outputs will be shown with the necessary information to connect the remaining of the process, customizing the behavior upon receiving the email:
- EventLogs: the CloudWatch Log where events are saved in text format
- EmailBucket: the name of the S3 bucket where emails and their attachments are saved
- ReceiptRuleSet: the name of the SES rule set
- EventBus: the name of the EventBridge bus where the event will be sent when the email is received
Manual steps
We need to manually activate the set of rules created by the stack from the SES web console by navigating to Configuration > Email receiving:
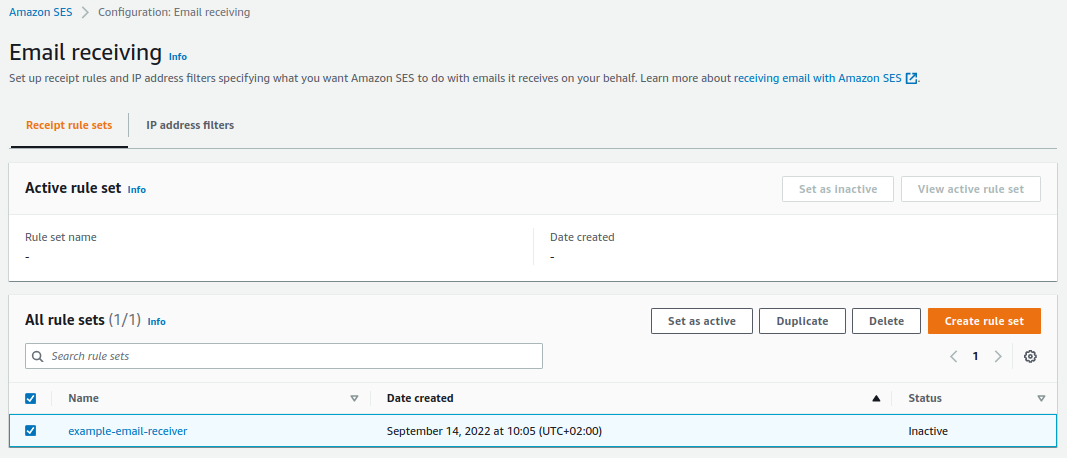
Select the set of rules with the same name as the stack and use the Set as active button to activate the email receiving functionality.
Conclusions
The shown solution represents only one of the many possible use cases where sending an email can be used within a business process, taking advantage of the interaction of AWS services.
Let’s briefly see other possible use cases without going into implementation details.
Ticketing System
In this use case, the user sends an email with an attachment to open a support request on a ticket system. It is very likely that a modern ticket system already offers the possibility to open requests via email. Still, it does not necessarily allow the flexibility achievable with a customized process.
The diagram of the components and their interactions is the same, already seen above. The only difference is that the Lambda function that receives the event from EventBridge connects to the Ticketing system to submit a support request and replies to the user with the assigned request number, which can be used for future reference.
Booking System
In this second use case, the user sends a booking or quote request, including the date, number of people, and corresponding personal data.
When the email is received, the Lambda function invoked checks and processes the content to extract the information necessary to create a reservation.
The function also validates the request and replies to the user if the necessary data is missing. If, on the other hand, the request is compliant, the function returns the booking number to the user with a summary of the information and payment instructions, if needed.
Supplier Order System
In this third use case, the user downloads a spreadsheet template from the supplier’s site; the sheet contains the list of products that can be ordered and a column to specify the desired quantity to buy.
The user fills in the file and sends it via email. The Lambda function connected to SES validates the email, and if there are no errors, it sends an event to an EventBridge bus which sends the event’s content to a FIFO type SQS queue.
Another Lambda function processes the messages in the queue, one at a time, according to the receiving sort order, downloading the attachment from the S3 bucket to process its content and submit an order request to the supplier’s system.
When the process ends, a reply is sent to the customer via email containing the pre-order number, the list of ordered products, and the order total.
In the end, we can also provide a summary of unavailable products that cannot be ordered as long as a forecast of the shipping date, provided the order is confirmed within a specific time.
Implementing an additional process that allows the customer to confirm the order by replying to the email could be possible.
Post of

☝ Ti piace quello che facciamo? Unisciti a noi!
You may be interested also in...
-
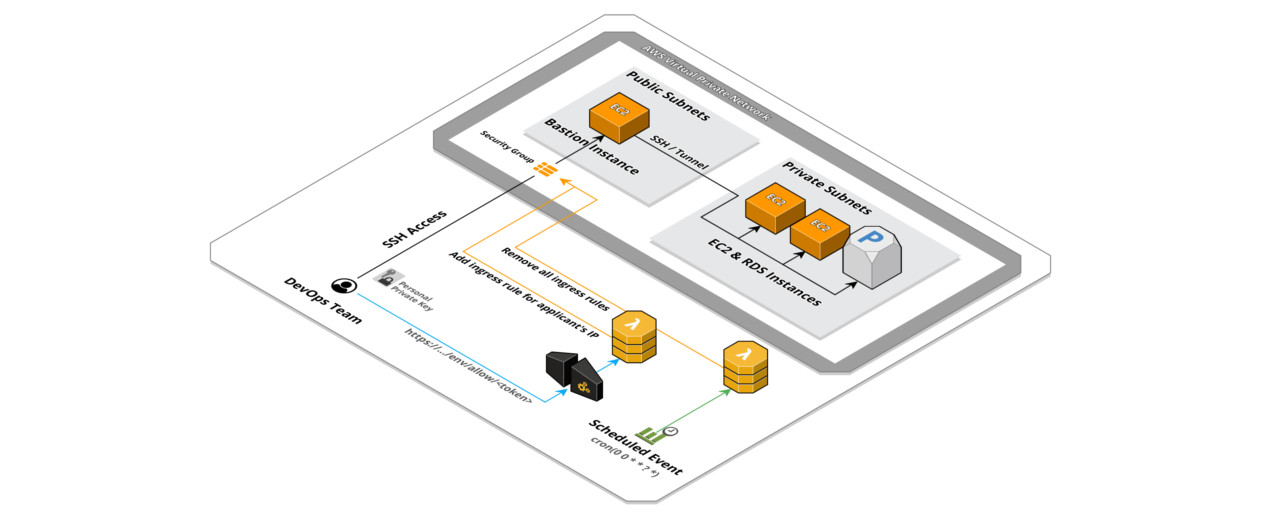
Ingress rules for dynamic IPs
|Management of Security Group ingress rules to allow access to dynamic IPs. Necessity Our infrastructures are designed to remain isolated in a private subnet of the VPC, this in order to increase the security level and block any type of unwanted access directly from network layer. -

My serverless journey
|How many times have you heard of Serverless? I’ve heard about it so many, too many maybe,so I decided to embark on this journey to discover this new technology.
-

Automatic Temporized Rds Scaling
|Temporized RDS read replica AutoScaling with Lambda and Route53 Starting situation One of our hosting infrastructure on AWS recently has encountered some problems due to a huge and rapid increase in traffic during some pre-defined periods, at the same time as a newsletter, that quickly brought many more users to visit our customer’s Magento e-commerce.